INSTALL OF A
MAGNAFLOW MAGNAPACK CAT-BACK
CAR
1997 Ford Mustang GT Coupe
TOOLS
Air compressor and tools (not necessary)
Sawzall (if available)
Ratchet
15mm deepwell socket
11/16” socket
3” extension
Lug wrench
3/8” socket
Jack
Jack stands
Wheel blocks
STEPS & TOOLS
- Break the lugs on the passenger side rear wheel.
- Jack the car up and place on stands. I placed stands
under all four corners.
- Remove the wheel you broke the lugs on.
- Remove one bolt using an 11/16” socket from the axle
damper (Fig. 1).

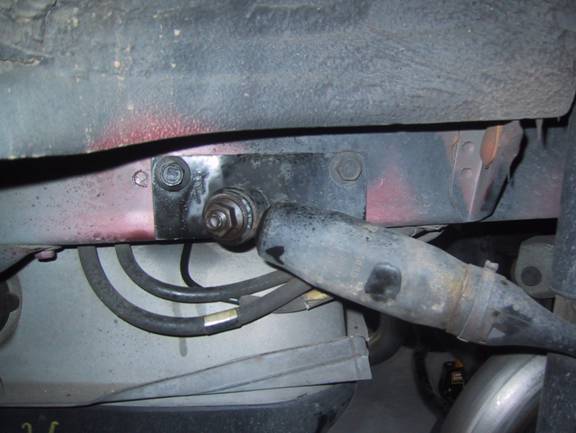
Fig. 1
- Cut the stock exhaust using a sawzall with a metal
cutting blade (if available) a few inches behind the muffler. Watch for brake
lines or anything else that may get in the way.
- Remove four bolts using a 15mm deepwell socket (see Fig.
2).

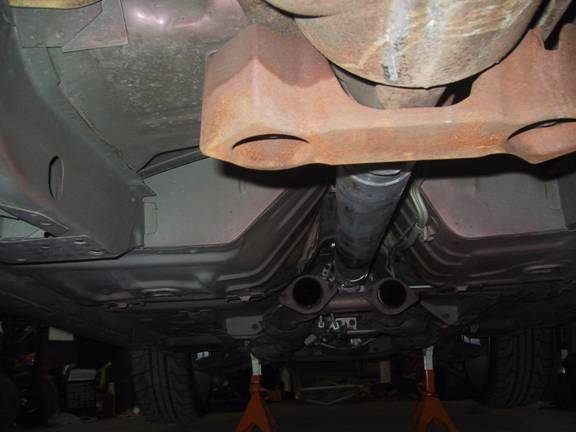
Fig. 2 (shown without exhaust for
clarity)
- Remove stock exhaust.
- Remove the stock hangers with a 3” extension and a 10mm
socket.
- Dryfit
the Magnapack on the floor so you know what pieces go where (Fig. 3). Keeping
old exhaust to reference may help.


Fig. 3
 Place
the two pieces that go over the axle.
Place
the two pieces that go over the axle.- Attach the new hangers supplied by Magnaflow using the
stock fasteners.
- Attach all pieces of the new exhaust, starting at the
H-pipe, do not tighten.
- Attach exhaust to the hangers, excluding the tips.
- Check all over for clearance.
- Tighten the four 15mm bolts at the H-pipe (or any other
pipe you may be using).
- Tighten eight bolts for the supplied U-bolts using a
15mm socket (Fig. 4)
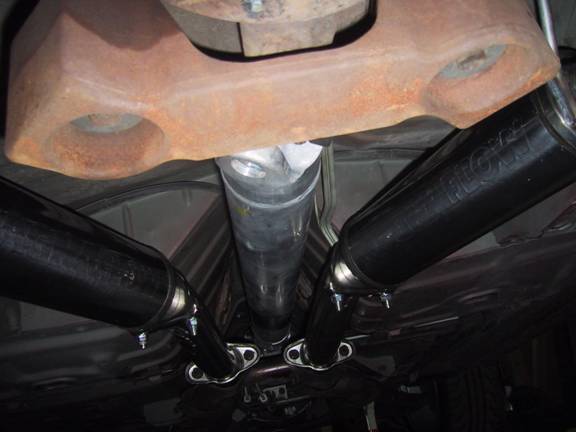
Fig. 4
- Place tips on the exhaust, align, and tighten using a
3/8” socket and the supplied allen wrench (Fig. 5).
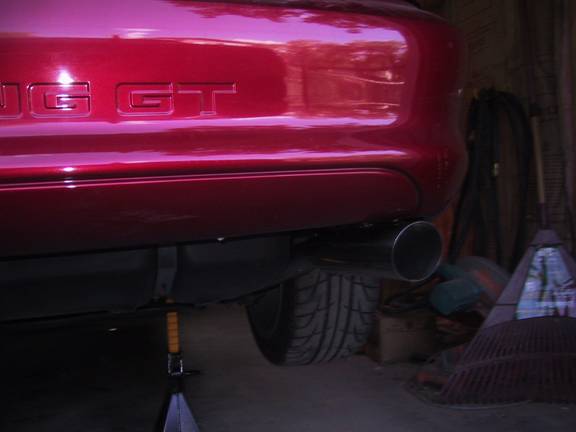
Fig. 5
- Start car up check for leaks.
- Reattach the axle damper.
- Replace wheel and tighten lugs as much as possible.
- Lower car.
- Torque the lugs to the rear passenger wheel.
- Start car and let neighbors know you got a new exhaust
(Fig. 6).
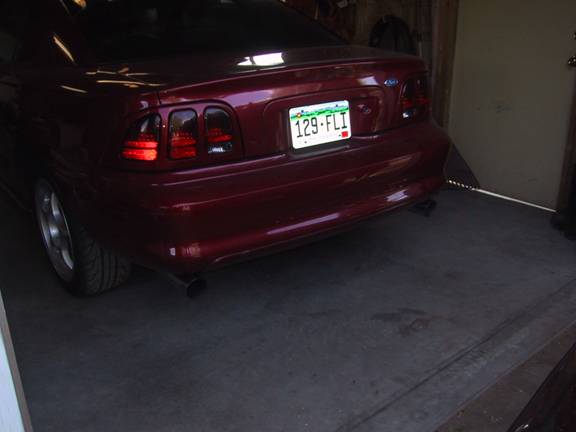
Fig. 6
- Drive car for 30 or so miles, jack it up and place the
stands, and re-torque all bolts again.
SUMMARY
Install took a little over an hour, maybe an hour and a
half, including breaks using air tools. This is the easiest thing I’ve done to
date to the Stang, the parts fit great and were of very good quality. I imagine
someone with minimal wrenching skills could handle this project pretty easily in
2-3 hours, and a more experience person in an hour or less.
DISCLAIMER
I am writing this from memory so if I have forgotten
anything or gotten any sizes wrong please email me at
bryant@theinternet.cc with any corrections.