10/18/11
Implementation of S
Curve Acceleration and Deceleration
With the 2.3.0 release of our PMX LPM software, we have
implemented S curve acceleration and deceleration. This has the effect of making the machine accelerate and decelerate
less aggressively and hence the user will notice less jerk when accelerating,
decelerating or changing direction.
Please see the following figure which demonstrates what we mean by an S
curve profile.
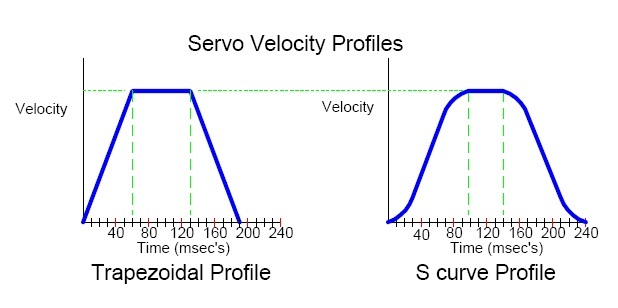
As you can see from this example, the S curve is less
aggressive at the transition points and will take more time to reach its target
velocity.
A consequence of our trapezoidal acceleration and
deceleration prior to this implementation was a machine that was a little
aggressive when feedrates were above 40 ipm.
This aggressiveness could lead to a less than desirable Z surface finish
when machining pockets or face milling. See the pictures below for a before and
after look at the surface finish when using trapezoidal
acceleration/deceleration versus using an S curve acceleration/deceleration.
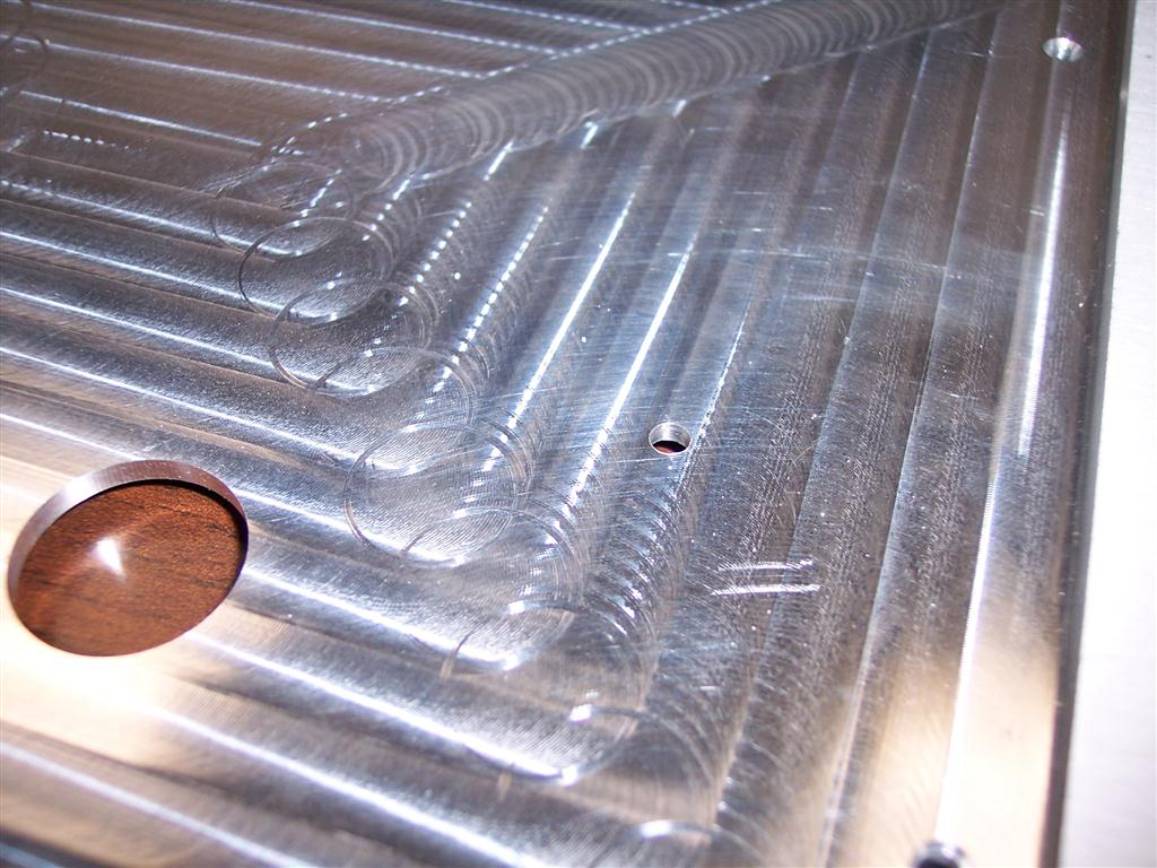
As you can see above, there is a scalloping finish when the
machine accelerates after changing direction.
This was caused by the tool resonating for a moment due the more
aggressive acceleration.
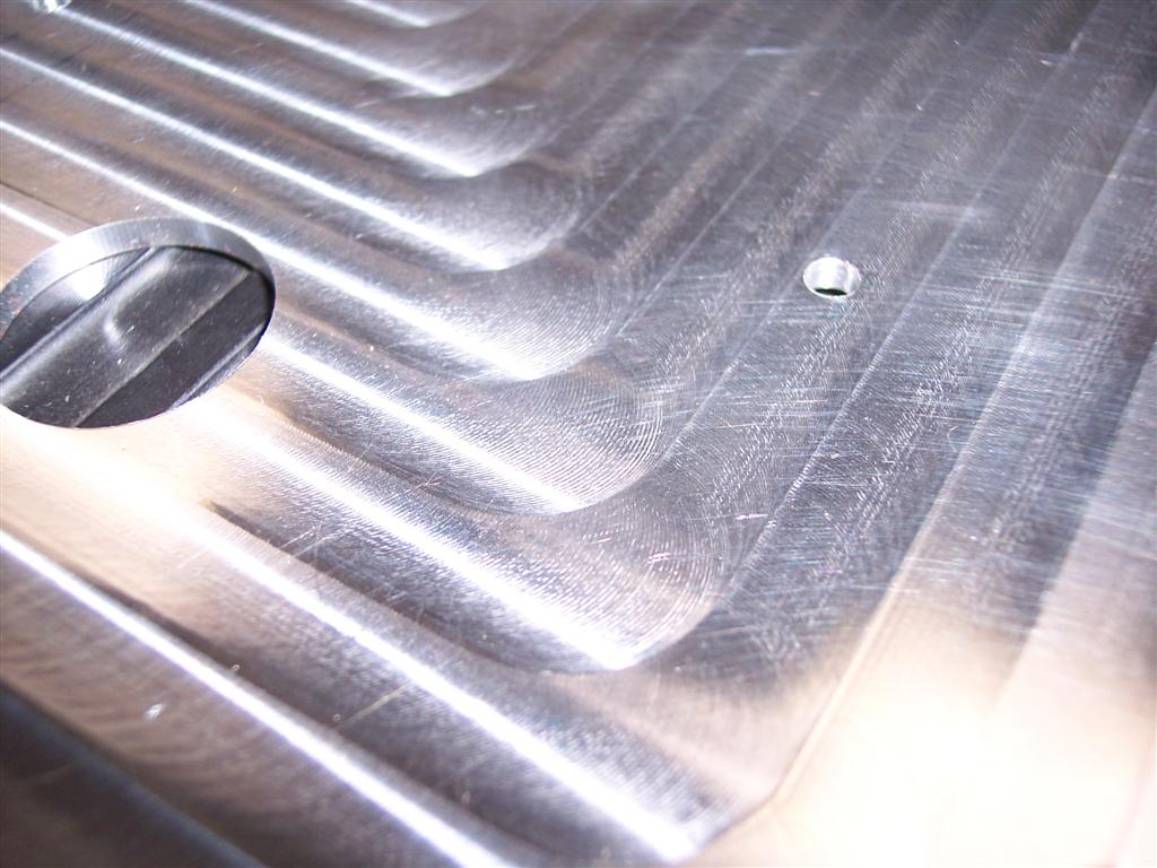
As you can see from this picture, the scalloping is gone with the new S curve acceleration.
Unfortunately, there are a few tradeoffs to the changes we made and hence some concepts that have to be explained further.
With the implementation of an S curve, the machine will take
a little bit longer to machine a given part.
This is simply because the machine is not as aggressive accelerating,
decelerating or changing direction. To
give everyone a reference for how much longer, please see the cycle times for
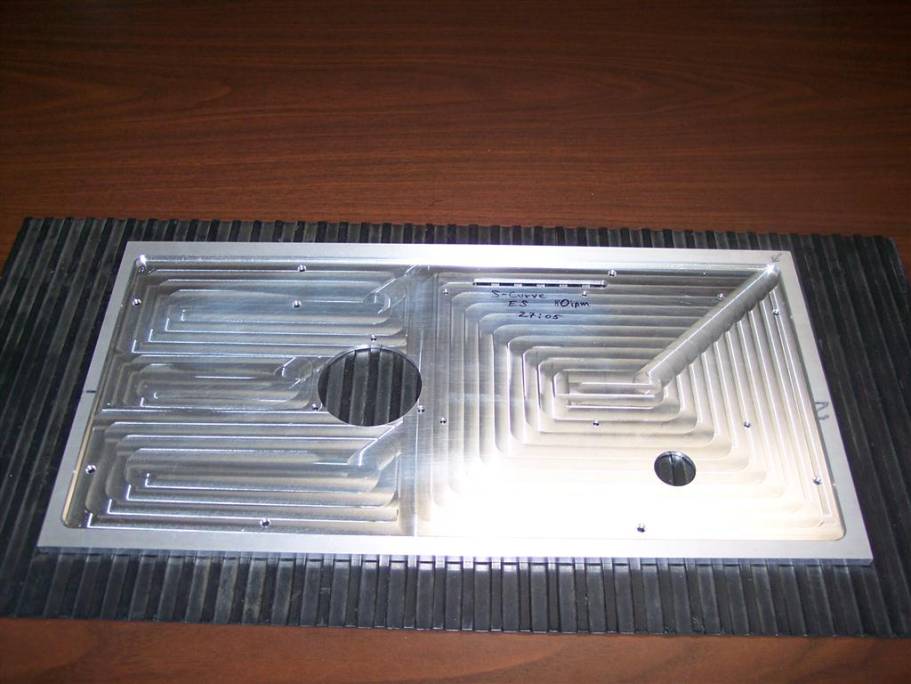
the following part. For those that are
observant, this is the run panel bezel that comes on the LPM machine. We machine this part and the programming
panel bezel (not shown) at the same time.
We rough these parts at 80 ipm on our shop LPMs. Listed below are the cycle times for the
various ways you can choose to machine these parts with our new software. I will explain these choices in more detail
further down in the document.
1. Cycle time with trapezoidal (current software)acceleration/deceleration – 24 minutes and 35 seconds
2. Cycle time with S curve acceleration/deceleration and the default exact stop mode – 25 minutes and 26 seconds
3. Cycle time with S curve acceleration/deceleration and corner blending ~ 25 minutes
As you can see, these parts now take approximately 1 more
minute to machine when comparing choices 1 and 2.
The following is a list of changes we have made to the LPM software.
1.
Service code 508 has been added to turn on and off S
curves. The default is off, but once
the user turns it on it will remain on until the user turns it back off. This service code is found under section D
of our service code list.
2.
S curves are utilized when your feedrate is greater
than 40 ipm. We have found that a trapezoidal profile produces an
acceptable Z finish at feedrates of 40 ipm or less.
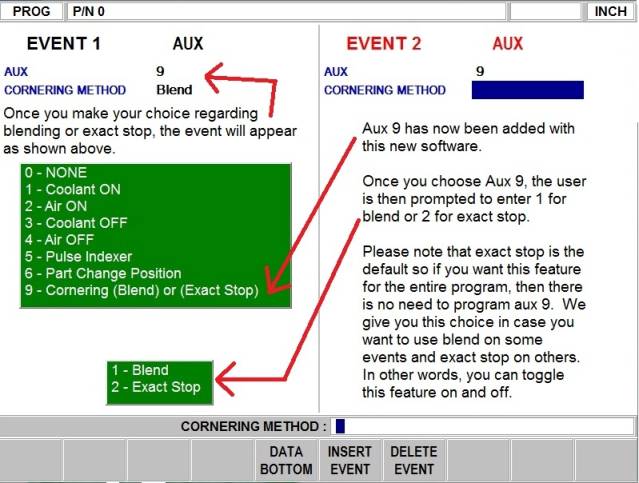
3.
In our AUX event, we have added a new prompt under 9
that gives the user the choice to have the control perform corner blending
(G64) or exact stop (G61). The default
is exact stop when S curve is turned on and this applies to feedrates that are
greater than 40 ipm. Please see the figure below for how the AUX
event now looks.
a.
Exact stop means the control will get into exact
position and there will be minimal error.
This is what adds extra time to a part cycle time as seen in my example
above.
b.
Corner blending will make the machine blend or round a
corner. The machine will not get into
exact position and hence you will see some error when machining. The error is dependent on the feedrate you
are machining at. The higher the
feedrate, the more error you will see.
With corner blending on, the machine will not slow down as much in the
corners and your cycle time will be faster.
Please note that cornering error will only show up at feedrates above 40
ipm.
c. Please note that G61 exact stop and G64 corner blending are common G codes found on many CNC controls and not unique to Southwestern Industries. G64 is often labeled as G61 cancel versus the corner blending term we use but it is in essence the same thing.
4.
Please note that if you do use corner blending in your
program, we will automatically get into exact position on the following moves
or events.
a. Bore and drill event – the final depth that you program in your event will get into exact position.
b.
All position or rapid moves will get into exact
position. For example, if you are
rapiding out of a hole in Z and then positioning in X and Y to a new hole
location, the control will get into exact position. You don’t have to worry about the control rounding the corner if
you have corner blending on.
c.
All individual Z moves that lead into XY moves will get
into exact position. For example, when
you feed down to the bottom of any pocket or profile, we will get into exact
position before moving the X or Y axis.
d. Helix and thread mill events will get into exact position at the beginning and end of the event.
e. Please note that when you are using tool compensation (tool right or tool left) and making a sharp outside corner, we generate a walk around arc to create the corner. This means the error will be minimal with corner blending turned on.
5. The following are the some notes about how exact stop (G61) works.
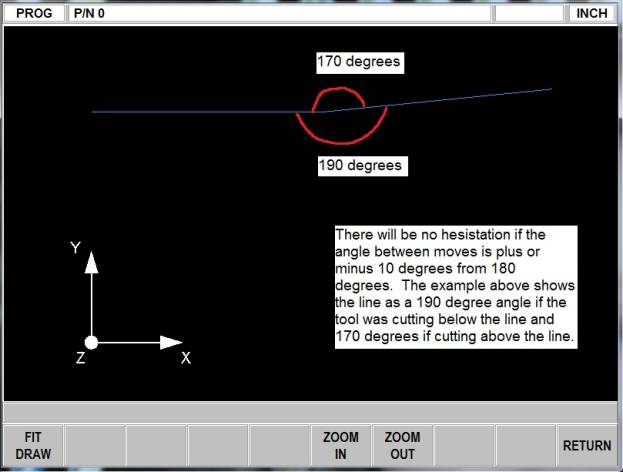
a.
Exact stop will only be used when the machine makes a
change of direction where the angle between the line you are on to the next
line is less than 170 degrees or larger than 190 degrees. See the illustration below for what this
specifically means.
b.
Surfacing type programs that are comprised of small
moves that have small angles between the moves should not require a G64 or
corner blending to be turned on to avoid hesitation.
c. All moves that are tangent to each other also will not have exact stop (G61) apply. Please note that when making a 90° outside corner with tool compensation applied, we generate an arc to machine the sharp corner so these moves are tangent.
d.
For all moves where exact stop will apply, the user may
notice a slight hesitation on these moves.
This is due to the control getting into exact position before performing
the next move.
6. Lastly, this software release also improves the speed at which we change tools. The chip to chip improvement is approximately 6 seconds.